If you’re new to drafting patterns, making an A-line skirt is a great place to start. By using basic measurements, you can create a simple yet stylish skirt that fits your body just right. Pockets, a zipper back, or even a button up can be added to customize your design and make it truly your own. I’ve found that when you keep things simple, like working with a basic skirt pattern, it allows you to experiment with different variations, such as darts or gathers, without feeling overwhelmed. This gives you the chance to build your collection of patterns and mix and match designs. Whether you’re inspired by a 50s themed tea party or love the look of a sundress, adding small details like puffed sleeves or changing the waistband can elevate the outfit and give you something made with your personal touch.
What is an A-line Skirt?
An A-line skirt is a classic design that is fitted at the hips and gradually widens down towards the hem, creating the iconic shape of a capital letter A. This style isn’t just limited to skirts but is also used for dresses and coats, all of which maintain the same flattering shape. The term “A-line” refers to this silhouette that is universally loved for its ability to create a balanced and elegant look. Whether you’re drafting your own pattern or simply looking to add a new piece to your wardrobe, this versatile design is a must-try for any beginner in sewing.
Why Choose an A-Line Skirt?
Wearing an A-line skirt can bring numerous benefits to your wardrobe. Not only does it enhance your shape, but it also offers great comfort. The A-line silhouette is flattering for most body types, as it accentuates the waist while allowing free movement around the hips and thighs. Whether you are looking for a casual or formal look, this skirt can easily be dressed up or down. The versatility of an A-line skirt means it pairs well with various tops and shoes, giving you endless outfit options. From my own experience, this style is a go-to when I want something stylish yet comfortable for a busy day. Plus, its timeless appeal ensures that it will never go out of style.
How to Calculate the Ease and Seam Allowance for A-Line Skirt Pattern Drafting
When you’re drafting your A-line skirt pattern, the next important step is to calculate the ease and seam allowance. Ease refers to the extra room added to the pattern to ensure that the skirt is comfortable to wear, while the seam allowance is the extra fabric around the edges of the pattern that allows for proper sewing and finishing. To get the correct fit, you need to adjust the pattern by considering the waist, hips, and thighs measurements. For the seam allowance, you typically add about 1/4 to 1/2 inch around all edges, but the exact amount may vary based on your fabric type and desired look. From my experience, getting this right helps the skirt fit smoothly and allows for enough flare. It’s essential to also make adjustments based on personal fit preferences, ensuring that the final design is both comfortable and flattering. With these steps, you’ll be well on your way to creating a perfectly drafted A-line skirt!
Adjusting the Ease for Your A-Line Skirt Design
When designing your A-line skirt, the amount of ease you add is crucial for comfort and fit. Ease refers to the extra fabric needed to create a more relaxed fit around the waist and hips. Depending on the fabric you choose, this could vary. For instance, if you’re working with a woven fabric, you may need 2-4 inches of ease for a fitted look, while with knit fabric, you might add 6-8 inches for a loose style.
Your personal preference plays a significant role in how much ease you add, as it affects the fit. For example, if your waist measurement is 28 inches and your hip measurement is 38 inches, you might want to add 4 inches of ease to ensure comfort. To determine the right amount, measure from the waist to the hip, and then decide if you want a more structured or relaxed fit.
The width of your A-line skirt also depends on how much ease you prefer. For a more fitted skirt, use measurements like 7.75 inches for the front and 10.5 inches for the back, which will give the skirt that subtle A-line shape. However, if you prefer more room, increase the ease to 4 inches or more at the hip. As you measure, always remember that proper ease will allow freedom of movement while maintaining the desired style.
Seam Allowance: What You Need to Know
When you’re drafting an A-line skirt pattern, one of the most important details to focus on is the seam allowance. This is the extra fabric you add around the edges of your pattern pieces for seam finishing. The type of seam allowance you choose, like a straight seam, zigzag, or even a French seam, can depend on the fabric you’re using and the look you want to achieve. For beginners, a 1/2 inch or 5/8 inch seam allowance is common, but some patterns may recommend a wider allowance, like 1 inch or 7.75 inches for the waist or hip areas. The key is to ensure you have enough fabric around your cutting lines to mark and finish the edges properly, so your skirt fits perfectly when sewn. Just remember, whether you are cutting your fabric with marking or sewing seam finishes like overlock or flat-felled, it’s all about making sure your seams hold strong and your skirt looks neat from front to back.
How to Create Your Own A-Line Skirt Pattern
If you’re new to drafting your own patterns, drafting an A-line skirt is a great place to start. A-line skirts are simple, flattering, and quick to make, which makes them perfect for beginners. The key is to get the measurements right, as it will set the foundation for your pattern. Start by taking accurate measurements of your waist and hips to ensure a well-fitted skirt. Once you’ve got those, you can draw your basic pattern, which starts with a straight line for the skirt’s center back. Then, gradually add curves to create the A-line shape that flares gently from the waist to the hem. Don’t forget to include a seam allowance so you can sew it together without a hitch. This process might sound a little tricky at first, but it’s a wonderful way to dive into the world of pattern making and start designing your own clothes. With practice, you’ll be able to customize the fit and style of your skirt, making each one uniquely yours.
Drafting the Straight Skirt
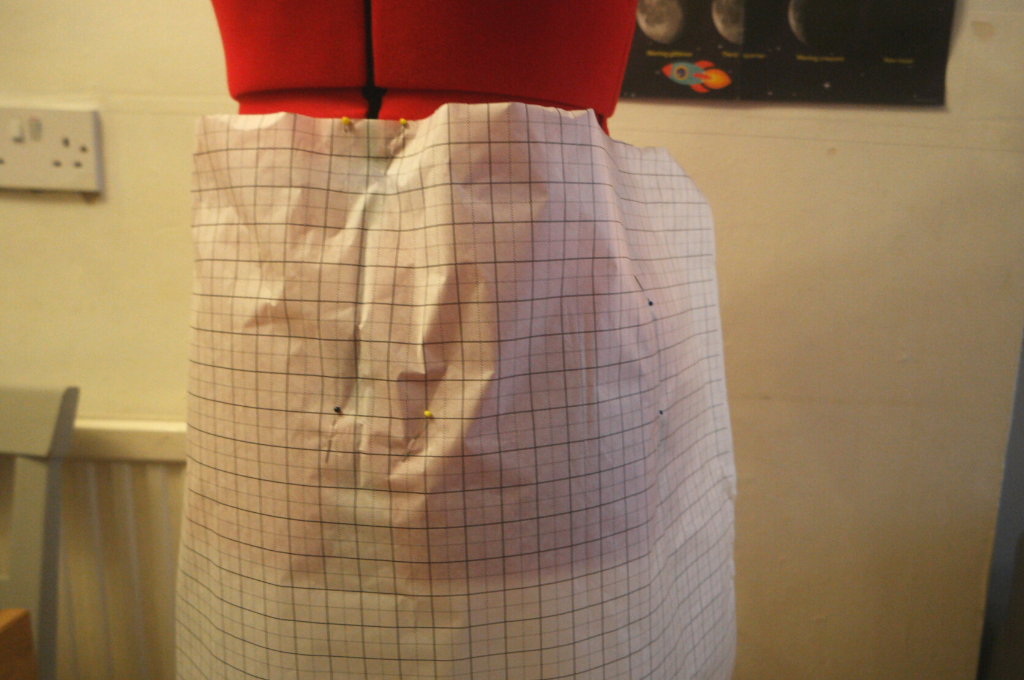
To begin drafting a straight skirt, start by folding your pattern paper in half. Mark the centre front and draw a vertical line to guide the skirt’s alignment. Measure the waistline, marking it with a pencil and use grids to ensure straight, accurate lines. Measure from your waist to the hips and draw a horizontal line to indicate this point. From the waist, use your measurements to shape the side seams, making sure the lines are straight and even. At the centre front, measure the length of the skirt, keeping in mind any extra room you may want for comfort or bagginess.
Once you’ve mapped out your basic shape, place the dress form on the table and use pins to secure your pattern. Be sure to check for any dart adjustments at the back of the skirt if you need a more fitted look. Mark where the side seam and centre front meet to create a perfect match when sewing. Don’t forget to consider elastic or a ribbon at the waistline for easy adjustments.
With the main structure in place, use a pencil to carefully trace any extra measurements and check for any inconsistencies in the lines. Always fold your pattern carefully to avoid wrinkles and double-check all vertical lines for precision
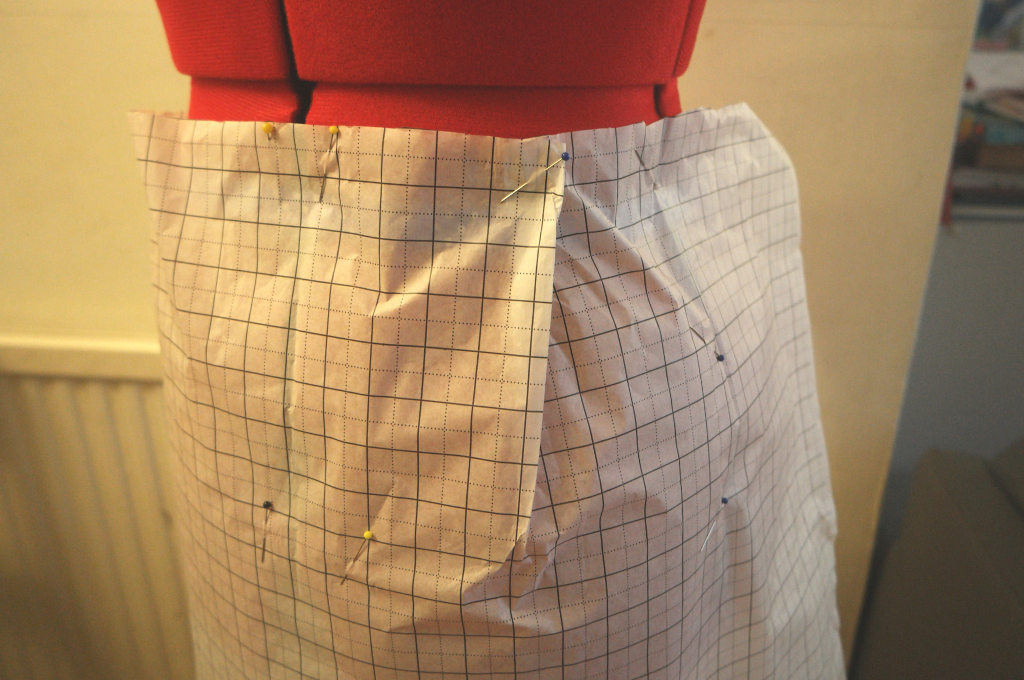
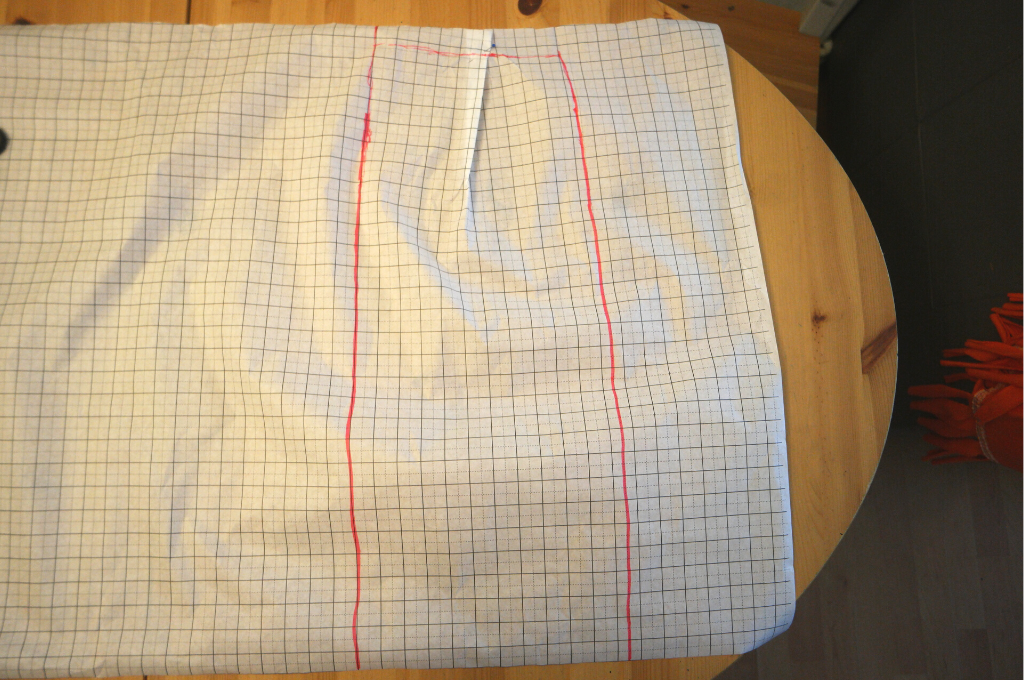
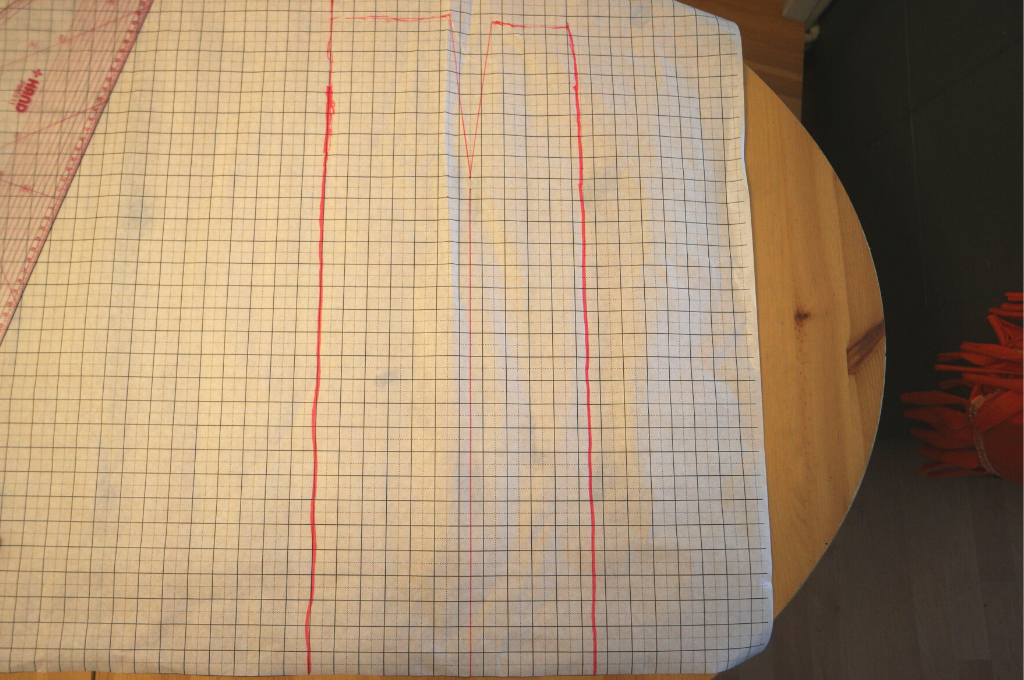
Drafting the Back
When you’re drafting the back of your A-line skirt, it’s almost the same process as the front. Start by taking another piece of pattern paper and pinning it to your body, ideally at the hips. If you’re doing this by yourself, you might need somebody’s help to check the fit. Make sure to check the vertical lines to ensure they line up, particularly the centre back. You can pin the paper to the side and back to get a feel for the fit. If you notice any bagginess, you can fix this with a dart, which can be placed about half way along the side seam where it feels like extra fabric gathers. For larger ladies, smaller darts often work better, so be sure to mark the waist and side seam clearly, adjusting as needed for the perfect shape.
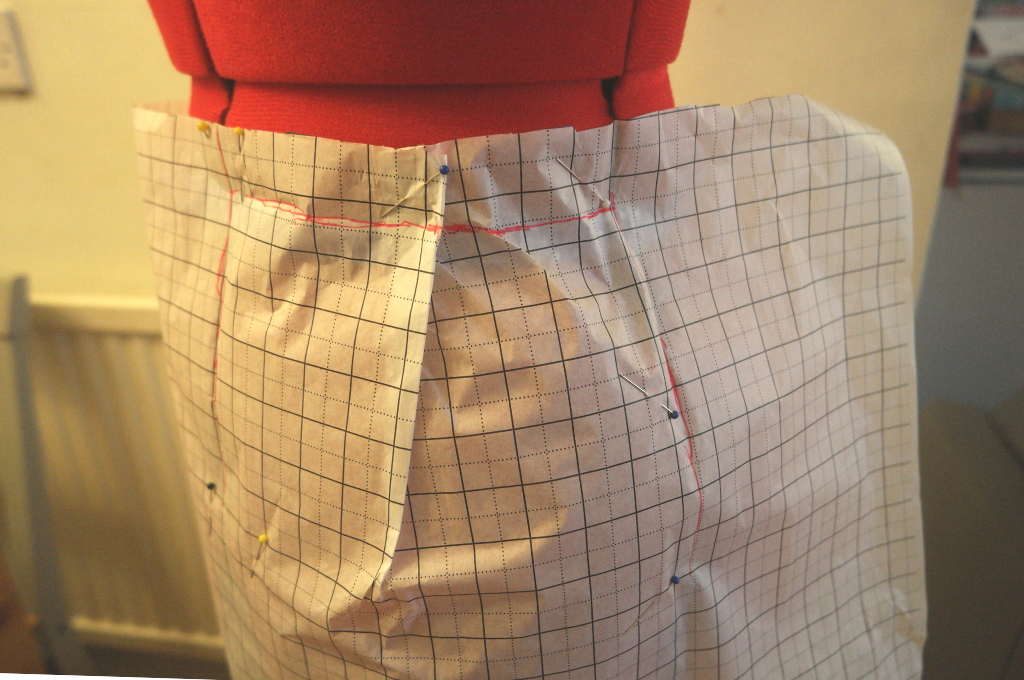
Finishing Off the Straight Skirt Pattern
When you’re finishing off your straight skirt pattern, the most important steps involve ensuring that all the elements are properly measured and aligned. Start by deciding the length of your skirt—this will affect how you adjust the hem later. After measuring, carefully mark and draw a straight line along the centre line and side seams of your pattern pieces. For a precise fit, ensure that both the front and back pieces are symmetrical and aligned. As you work your way down, measure again to avoid any irregularities that could mess up the fit. Lastly, when it comes to the hem, take your time to adjust it evenly across the entire skirt to give it a polished finish.
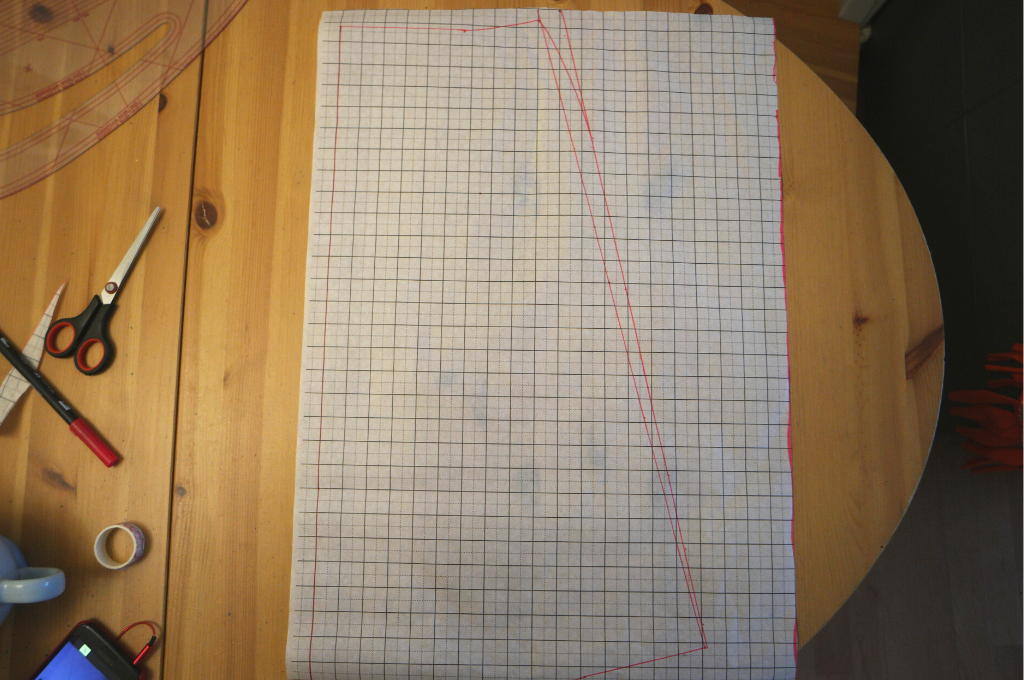
Transforming the Straight Skirt Pattern into an A-Line Skirt
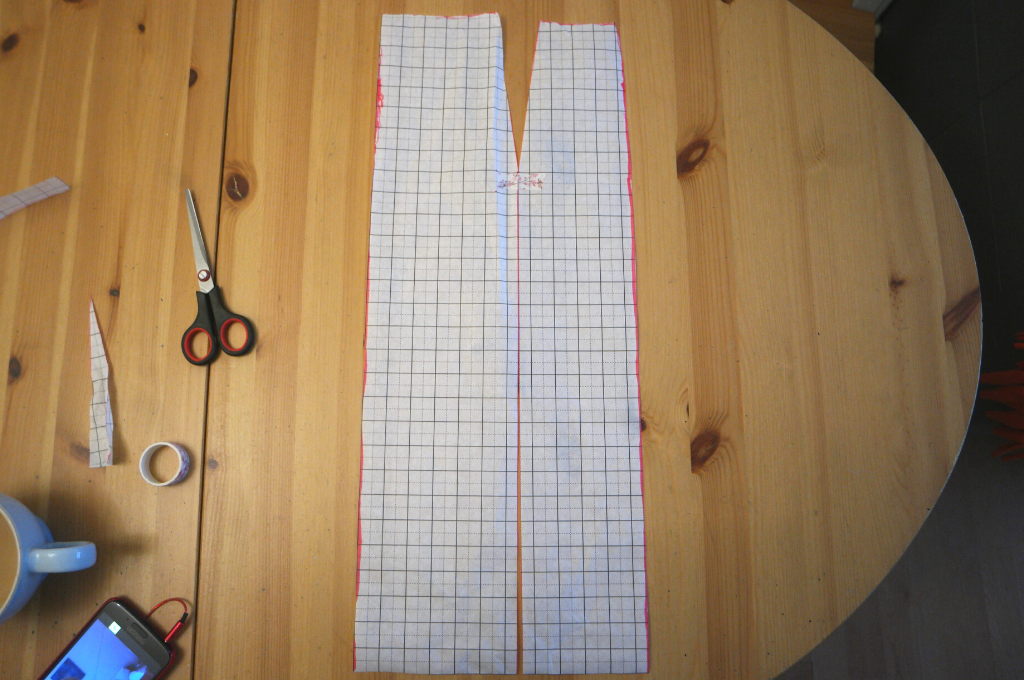
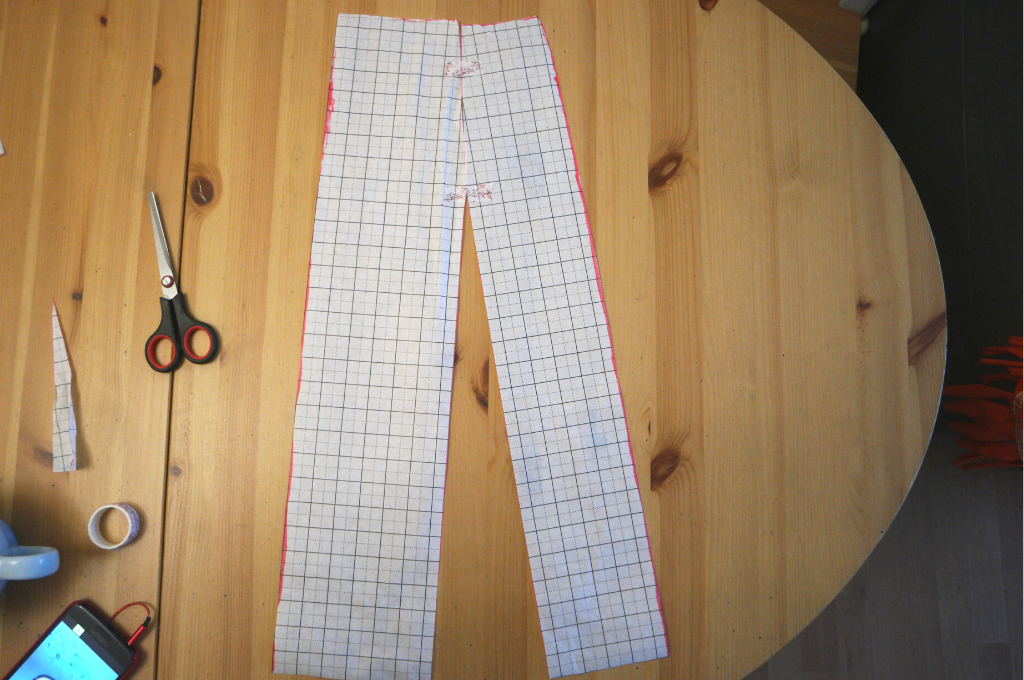
To turn a straight skirt pattern into an A-line skirt, the first step is to decide where to make changes. Start by marking the waist and side seam. Use a vertical line to extend from the waist down to the hem. At the waist area, use a French curve to help create a smooth curve for the A-line. Once you have your basic shape, start adding fullness to the skirt by drawing a line from the side seam downwards, making the cut line flare outwards.
You will want to cut out the pattern piece at the marked edges. From the waist, measure the desired cm to make the curve more dramatic towards the hem. Remember, the key to making it an A-line is gradually increasing the width as you go down. Use tape or pins to stay the pattern in place while adjusting the edges. A little trick I use is to imagine a dinner plate shape for the hem to ensure that the curve stays smooth and symmetrical. Once the pattern is adjusted to your liking, join the pieces, and the skirt is ready to cut from your fabric. Keep the outside line and inside line aligned as you prepare to cut. You’ll now have a fit that moves beautifully with every step!
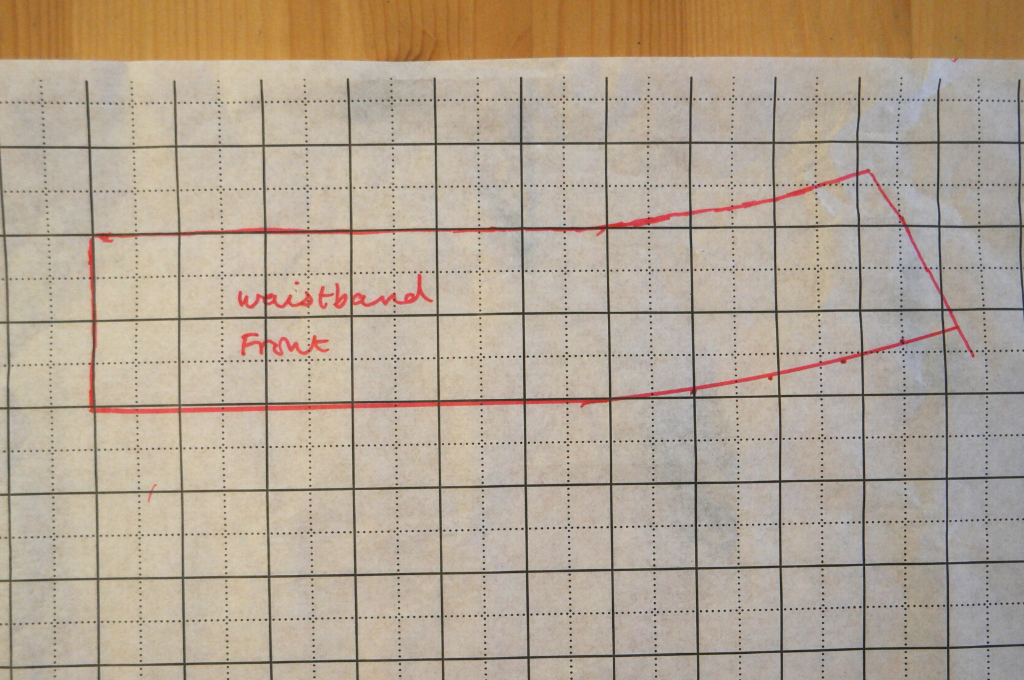
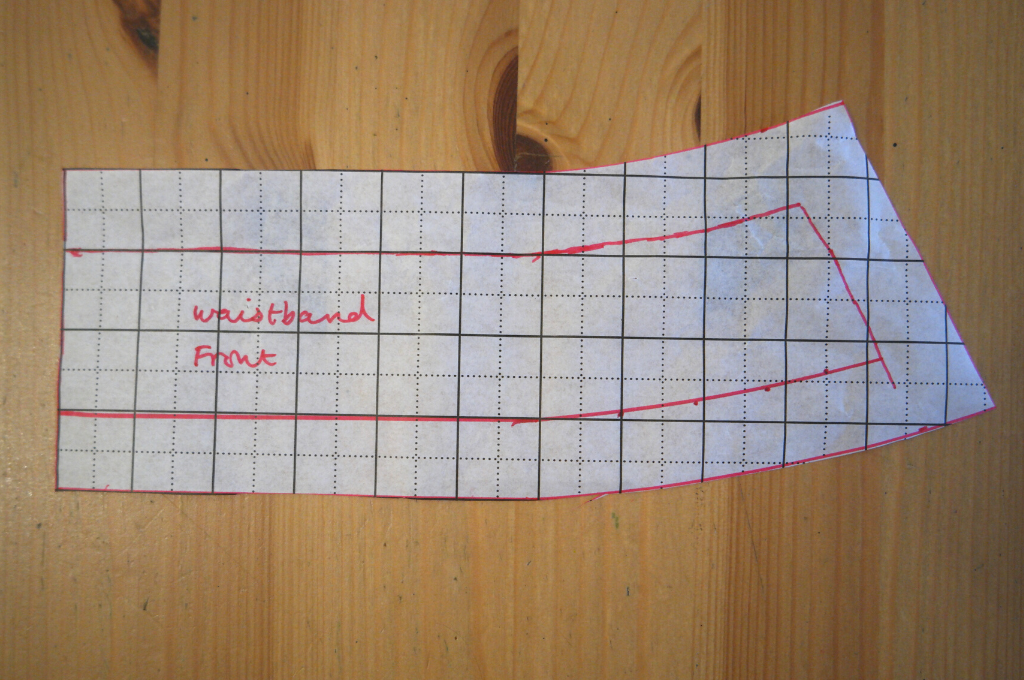
Draft the Waistband and Add Seam Allowance to the Pattern Pieces
To draft the waistband for your A-line skirt, start by tracing the front piece and back piece of your skirt pattern onto a new sheet of paper. Be sure to mark the centre front and centre back lines clearly. You’ll need to make the waistband slightly shorter than the waist measurement of your skirt, as it should sit comfortably around your body. A simple trick is to subtract about 2-3 cm from your waist measurement, depending on how much ease you want to allow.
When it comes to the seam allowance, make sure to add about 1.5 cm around the waistband pieces and along the side seams of the skirt. This is important for joining the pieces together. The seam allowance will also help to ensure your skirt has a professional finish. When cutting the waistband pieces, remember you’ll need two pieces: one for the front and one for the back of your skirt. If you prefer, you can fold the fabric at the centre front to avoid cutting out an extra piece. Also, don’t forget to mark the top and bottom of the waistband, as well as the side seam, where your waistband will join the skirt.
You can opt for a simple facing or add extra detailing to the waistband to make it stand out. The key is to stay consistent with the seam allowance to avoid any unwanted fitting issues. You’re now ready to cut your pieces, ensuring they match perfectly for the final assembly.
Words not used: right hand, left hand, difference, fold, lower, shape, trace, half, made, need, join, pieces.
Adding Seam Allowance to the Skirt Pattern
When drafting your A-line skirt pattern, it’s important to ensure your skirt front and back sections have enough room for seam allowance. Start by placing your pattern on folded fabric, making sure it’s aligned correctly. For the front section, add a 2 cm seam allowance on all sides, leaving enough room for the side seams. Don’t forget to leave a 2 cm seam allowance for the bottom hem too. The back will need 2 pieces (as you’ll likely cut it on the fold) and also have seam allowances for the side seams. Once you have all your cut pieces ready, you can begin assembling them with your sewing machine. After a few weeks of practice, you’ll be able to make the perfect A-line skirt, fit to your exact measurements.
FAQs
Fabric Needed for an A-Line Skirt
For an A-line skirt that falls to the knees, you’ll generally need around 1.8 m to 2 yards of fabric. This should be enough for most sizes, but it’s always safe to get a little extra.
What is an A-Line Skirt?
An A-line skirt is a classic, triangular shape, flaring from the waist to the hem, like a capital letter A. It’s fitted at the waist and comes in mini, midi, or maxi lengths. You can choose plain or patterned fabric. Use measuring tape, ruler, pencil, and fabric chalk to mark and cut your pattern for a perfect fit.
How to Line Your Skirt
For the lining, use a smooth, lightweight fabric and prewash it. Cut the fabric into pattern pieces and sew them to the outside. Fold the top edge to the waistband and hem the bottom edge to finish the skirt.
How Wide Should an A-Line Skirt Be?
To determine the width of your A-line skirt, start with the hips measurement and add 2-4 inches. Gradually divide the width as you approach the hem, increasing by 8-16 inches for more fullness. Make sure the centerfold stays aligned for a balanced, wider bottom.
Who designed the A-Line Skirt?
In 1955, Christian Dior introduced the A-line skirt as part of his A-Line collection, revolutionizing skirt design with its classic shape. Dior, the renowned fashion designer, created a timeless piece still popular today.