When I first learned to draft a basic sleeve, I found it helpful to start with a free, printable PDF tutorial that walked me through each step. It felt more like a guided, interactive journey than a rigid lesson. Without needing any maths or prior experience, I followed the method to create a custom, set-in sleeve that perfectly fits both my body and bodice measurements. The process began by learning to measure the length of the front and back armhole, then sew the shoulders together so I could draft the sleeve around the pattern pieces accurately. I made sure to remove the shoulder seam allowance from the final measurement, which helped shape the triangle that forms the sleeve cap. Whether the legs of this triangle are equal or not affects the steepness and angle a steeper, narrower cap gives more structure, while a shallower, wider one feels more relaxed. This change in angle also affects how long or short your sleeve might feel. I always draw a swooping, soft curve that follows the natural armhole, and I’ve found this shape is quite forgiving for beginners. One of the most important things to keep in mind is how the sleeve sits under the bottom and over the top of the arm; a normal amount of ease can make or break the fit. Before cutting, decide how long you want the sleeve and how it should taper don’t be afraid to play around and have fun with the design. You can use this block without darts, and this method can be easily applied to any design variation. If you’re ever stuck, there’s a corresponding YouTube video where the process is demonstrated clearly, with each step shown in photo form. The provided fractions, decimals, and conversion table helped me with precise measuring, and the best part it’s all free to use, including manual handouts for offline help, with no token or amounts required. You’ll be confidently modifying this into gathered, pleated, flounced, or puffed styles in no time.
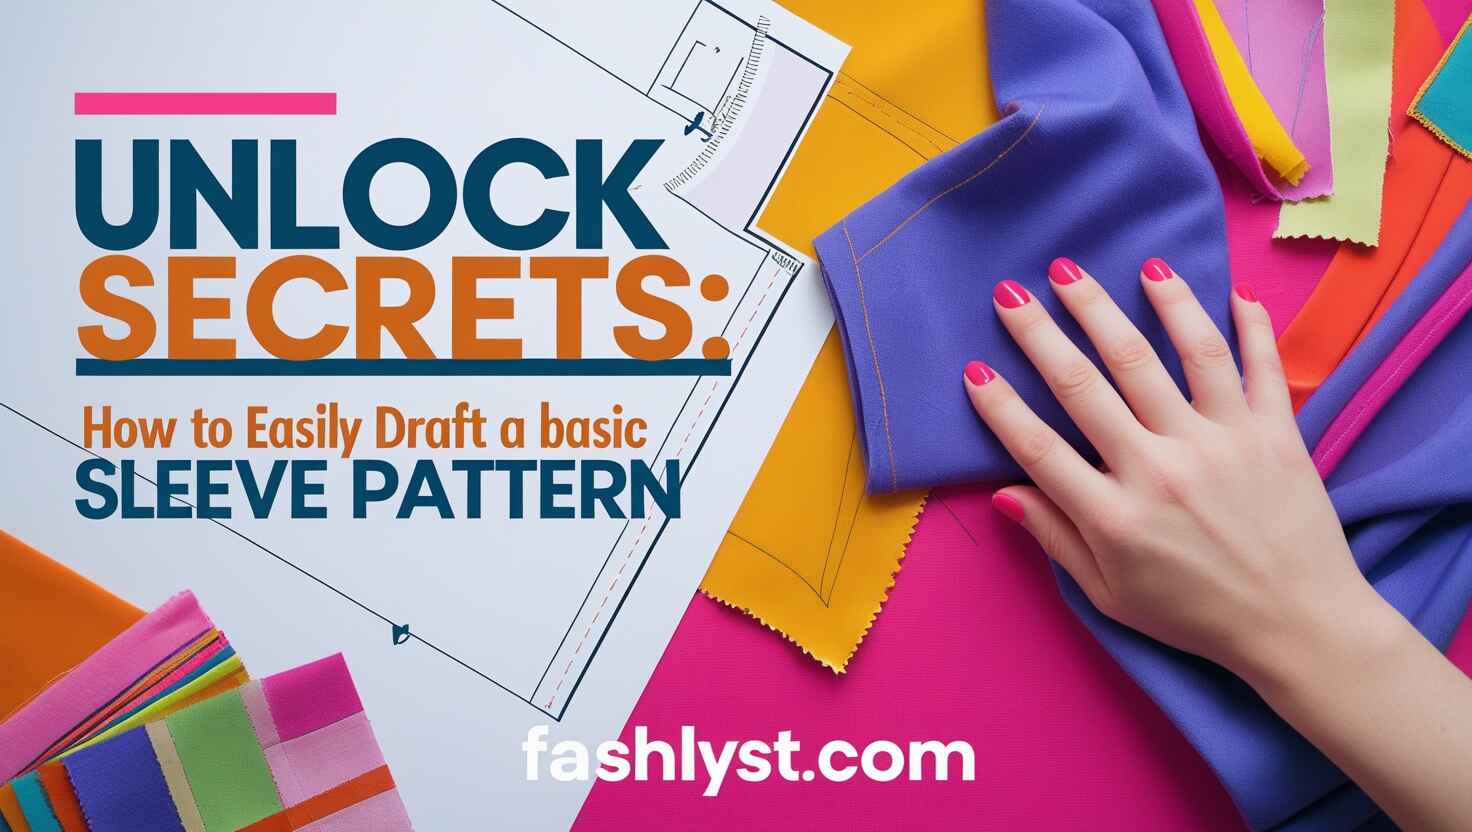
How To Easily Draft A Basic Sleeve Pattern
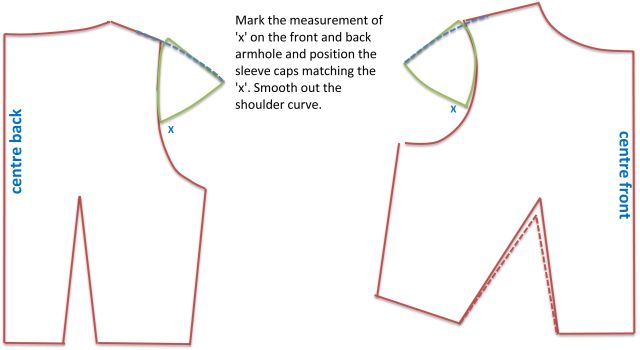
When I need to adjust a sleeve pattern to match a new shirt, I always check if the curve needs to be longer. To do this, I often change the width slightly or raise the sleeve cap height, and sometimes I do a mix of both for better balance. These small tweaks help the sleeve blend smoothly into the armhole, especially when working with patterns that aren’t a perfect match.
Over time, I’ve found that even a little increase in cap height can improve the fit and movement without changing the whole pattern. Adjusting a sleeve this way gives more control and helps me reuse existing patterns without starting from scratch.
What Makes a Sleeve Truly Basic?
When I first started learning sewing for dressmaking, I realized how essential a basic sleeve is. Among all the patterns, the set-in sleeve stands out as one of the most important elements in creating a well-fitting garment. It’s not just one of the easiest to learn, but it’s also incredibly versatile. A simple sleeve design like this can be transformed into endless variations you can add pleats, folds, flounces, or gathers to bring life to your creations.
Though it may seem very basic at first glance, the pattern is the foundation for so many looks. You may not realize how many beautiful styles begin from this otherwise plain structure. Learning how to draft this sleeve helped me understand the rhythm of fashion design how something simple becomes stunning with just a few thoughtful changes. That’s the beauty of a basic set-in sleeve pattern it’s a gateway to creativity for both beginners and pros.
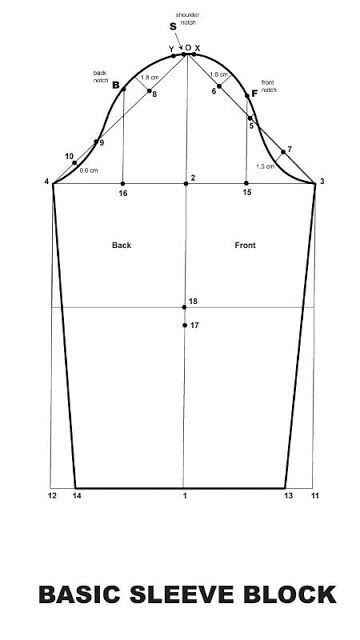
The Shape of the Sleeve Cap
From my experience in drafting sleeves, I’ve learned that the shape of the sleeve cap plays a huge role in how well the sleeve fits and moves with the arm. On the front part of the pattern, the over-arm and under-arm curves are more prominent and deeply curved, which helps the fabric follow the natural anatomy of the shoulder.
This difference in shape between the front and back is not just for style it’s to support the actual function of the arm, allowing freedom when reaching forward. If you look at an image of a sleeve cap, you can clearly see this contrast between the parts. It’s these small changes that reflect the actual human form and make a well-drafted sleeve stand out in both comfort and design.
Sleeve Angle and Width
When drafting a basic sleeve, understanding the triangle shape formed by the angles of the sleeve at the shoulder is key to achieving the right fit and appearance. For example, wide sleeves with short sleeve caps usually point out from the shirt, which is often seen in athletic shirts or casual sweatshirts. This allows you to raise your arms freely without the whole shirt being pulled up, giving you better movement. However, it also leaves excess fabric around the armpits, which can look bulky. That’s why for something like a regular t-shirt, I prefer medium wide sleeves with medium sleeve caps they offer just enough room to move without sacrificing a tidy appearance.
If you’re going for a more professional or formal look, narrow sleeves with high sleeve caps work best. These point down neatly from the shoulder and create a clean profile that hugs the upper arm nicely. I’ve used this style when I wanted the garment to look sharp and structured, but the downside is obvious once you raise your arms, the whole shirt tends to lift with it. So, when drafting your sleeve, you have to consider the range of movement you need versus the kind of look you want. Whether it’s a professional, casual, or athletic style, adjusting the sleeve, caps, and their width or height short, medium, high, narrow, or wide directly affects how the garment performs and feels.
Drafting a Sleeve That Points Out But Stays Narrow
If you’re aiming for a sleeve that points outward yet stays narrow, you’ll need to tweak your pattern pieces with intention. Start by making the armhole slightly smaller on both the front and back of the bodice this can be done by raising the bottom curve and then carefully readjusting that curve to fit snugly. A short sleeve cap adds to that outward-pointing shape, while keeping the sleeve slim along the arm. Personally, I find that choosing a drop shoulder method gives me even more freedom to control the width and shoulder angle however I like. This approach offers the flexibility to build a sleek look while still getting the dramatic outward shape you want.
Step-by-Step Guide to Creating a Perfect Sleeve Pattern
To draft a basic sleeve pattern that offers a comfortable fit and allows proper ease, it’s crucial to begin with the right measurements. From my own experience, missing even one can throw off the whole sleeve block. Always measure the full arm length from the shoulder down to the wrist, making sure the posture is natural and relaxed. The hand circumference matters too especially near the wrist so the sleeve doesn’t feel tight or loose. One often overlooked point is the bust measurement; even though it’s not part of the sleeve directly, it helps with sizing and how the sleeve connects at the shoulder, ensuring the pattern aligns smoothly with the bodice. If you’re aiming for an accurate shape that can adapt to any garment, take time with this step precise inputs here make all the difference when drafting a true-to-form sleeve block.
How to Use Measurements to Draft a Basic Sleeve Pattern
When I first started learning how to draft a basic sleeve block, I realized how crucial it was to work with clear example measurements. For this method, you’ll need three key figures: arm length, hand circumference, and bust circumference. Let’s say your arm measures 24 inches, your hand is 9 inches around, and your bust is about 37 inches these numbers are perfect for building a foundational sleeve pattern. Using these specific figures, I was able to confidently calculate the shape and sizing of the sleeve while ensuring it fits smoothly into the rest of the garment. These values act as a reliable guide to maintain proportion, flow, and ease in your design, especially when you’re aiming for a clean, wearable block. Once you understand how to adapt your draft to these inches, you’re no longer guessing you’re creating a pattern that mirrors your body’s needs.
FAQS
How Do I Draft a Sleeve Pattern As a Beginner?
Begin by taking accurate measurements and marking them on your sheet. Align front and back lines the same way for a fitting, planned look it may seem random, but it all works out perfectly in the end.
What is the Formula for a Sleeve Pattern?
A: To draft a basic sleeve pattern, draw a rectangle with length = arm length + 3 inches and width = (Bust circumference / 5 + 0 to 1 inch) × 2 + 3 inches. For example, a Bust circumference of 37 inches gives a width of 17.8 inches and a length of 27 inches using this easy calculation.
Drafting a Pattern Using Your Measurements
To draft a basic sleeve pattern, start by taking measurements, then sketch your design on a flat sheet of paper, plot the length, and draw horizontal lines to mark the shoulder, bust, waist, and hip, then connect all using the bust, waist, and hip measurements in one smooth line.
How to Measure Sleeve Pattern?
To measure your sleeve pattern, put the tape right around the arm where lots of us feel it’s most natural usually near the underarm. I slide my thumb under the tape so it comfortably touches but doesn’t squeeze, then check what the tape reads. Just make sure it fits well there’s no room for guessing.
How to Find the Right Sleeve Length?
To get a proper sleeve length, always measure from the shoulder to just past the wrist bone where the shirt cuff should sit. Be sure to slightly bend the elbow to allow ease, since the arm’s natural position isn’t fully straight do not skip this or the result may be short.
How to Draw a Sleeve Curve?
To draw a sleeve curve, use a French curve once, align it with the armhole, and ensure all contextually related entities, numbers, and content are organized as requested. Always begin with accurate extraction.